Simple EnviormentObject and Published method to show different views

So, you’ve got a single view container, let’s call it “ControlCenter” that you want to show one of three sets of controls within. Typically you’d write three views, and try to intiatiate these views, push/pulling into focus.

With SwiftUI creating a centralized method where the views are unaware of when/why they will appear, but also the ability to summon these views should be possible by any other arbitrary portion of the app.

Enter @EnviormentObject and @Published

First lets create our data/control class:


   //  CommandCenterManager.swift
   //  Created by John Marc on 1/9/23.

   class CommandCenterManager: ObservableObject {
      @Published var currentView: CurrentView
      
      init() {
         currentView = .first
      }
      
      enum CurrentView {
         case first, second, third
      }
      
      func getViewPosition(currView: CurrentView) -> Int {
         var viewPosition = 0
         
         if currView == .first {
            viewPosition = 1
         }
         
         if currView == .second {
            viewPosition = 2
         }
         
         if currView == .third {
            viewPosition = 3
         }
         
         return viewPosition
      }
      
      func getNextView() {
         let currentPos = getViewPosition(currView: self.currentView)
         
         print("CurrentView: \(self.currentView)")
         if currentPos == 1 {
            currentView = .second
         }
         if currentPos == 2 {
            currentView = .third
         }
         if currentPos == 3 {
            currentView = .first
         }
         
         print("NextView: \(self.currentView)")
      }
   }

From there, on app creation let’s tell our app about this EnviormentObject:

   //  CommandCenterApp.swift
   //  Created by John Marc on 1/9/23.

   import SwiftUI

   @main
   struct CommandCenterApp: App {
      @StateObject var ccm = CommandCenterManager()
      
       var body: some Scene {
           WindowGroup {
               ContentView()
               .environmentObject(ccm)
           }
       }
   }

Excellent, let’s create the container to hold our views and the views themselves:

   //  CommandCenterViews.swift
   //  Created by John Marc on 1/9/23.

   import Foundation
   import SwiftUI

   struct CurrentView: View {
      @EnvironmentObject var ccm: CommandCenterManager
      
      var body: some View {
         switch ccm.currentView {
         case .first:
            FirstView()
         case .second:
            SecondView()
         case .third:
            ThirdView()
         }
      }
   }


   struct FirstView: View {
      var body: some View {
         VStack {
            Text("FirstView")
         }
         .frame(width: 500, height: 500)
         .background(.red)
      }
   }


   struct SecondView: View {
      var body: some View {
         VStack {
            Text("SecondView")
         }
         .frame(width: 500, height: 500)
         .background(.green)
      }
   }

   struct ThirdView: View {
      var body: some View {
         VStack {
            Text("ThirdView")
         }
         .frame(width: 500, height: 500)
         .background(.blue)
      }
   }

And finally the view that calls into this CurrentView:

   //  ContentView.swift
   //  Created by John Marc on 1/9/23.

   import SwiftUI

   struct ContentView: View {
      @EnvironmentObject var ccm: CommandCenterManager
      
       var body: some View {
         VStack {
            CurrentView()
            Button("Next View", action: {
               ccm.getNextView()
            })
         }
       }
   }

   struct ContentView_Previews: PreviewProvider {
       static var previews: some View {
           ContentView()
       }
   }
Novel Tip: Setting breakpoint with command && continue

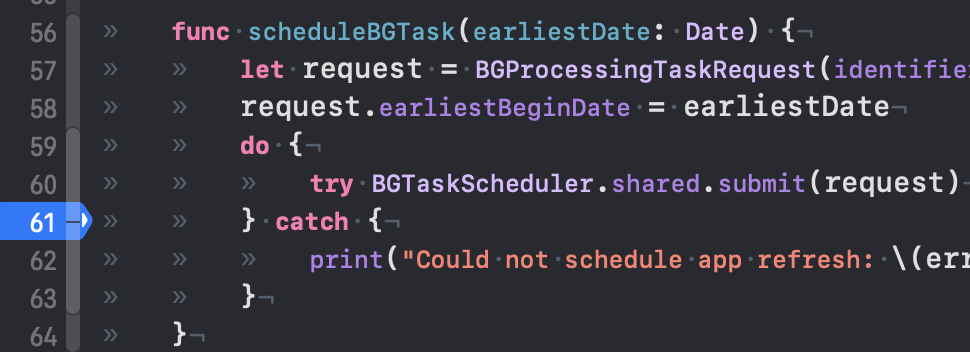
In some cases you want to be able to run a command once a certain part of your code is executed. An example is setting a breakpoint after BGTaskScheduler.submit(), which then executes a command to force run that task.

https://developer.apple.com/documentation/backgroundtasks/starting_and_terminating_tasks_during_development

How this would work in real time:

  • Write BGTaskScheduler.submit()
  • Set a breakpoint immediately after submitting
  • Build and run
  • App stops at breakpoint
  • Run hand currated snippet
  • Continue

Instead, we can set the breakpoint and modify the breakpoint to handle all of that!

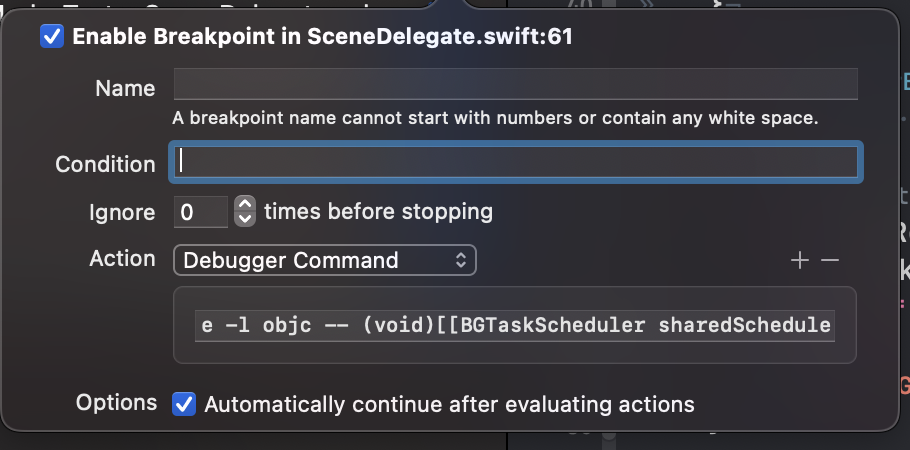
  • Set breakpoint where you wish Breakpoint set on submitting a background task to the scheduler
  • Go to breakpoints tab in left column
  • Right click on the new breakpoint, click Edit
  • Set Action to “Debugger Command”
  • Enter the command Secondary window, editing a breakpoint with options to complete actions and continue running app
  • Optionally, select to “Automatically continue after evaluating actions” which will continue running the app and not stop

Success! Now you will hit the location in your code, automatically input the command and (optionally) continue running your app without doing anything else.

Metal Render Pipeline

Elements to know:

  • MTLDevice: The software reference to the GPU hardware device

  • MTLCommandQueue: Responsible for creating and organizing MTLCommandBuffers for each frame

  • MTLLibrary: Contains the source code from your vertex and fragment shader functions

  • MTLRenderPipelineState: Sets the information for the draw, such as which shader functions to use, what depth and color settings to use and how to read the vertex data

  • MTLBuffer: Holds data such as vertext information in a form that you can send to the GPU

####(Typically) only one per app instance: - MTLDevice - MTLCommandQueue - MTLLibrary

Typically on iOS there is only one available GPU. When creating a new MTLDevice via MTLCreateSystemDefaultDevice() you are returning the defaults. However, there is a possiblity that your hardware host device will have multiple (either future iOS hardware, or MacOS), in which case you would want to get a list of available GPU by quering MTLCopyAllDevices().

MTLCommandQueues hold MTLCommandBuffers, this allows the CPU to line up instructions (buffers) into the command queue which hold it in sequential order.

MTLLibrary is the result of compiled .metal files. These .metal files are writen in Metal Shading Language (MSL) which is C-ish looking. Part of the reason Metal is performant is because this compiling is done during app building or initialization of the app.

####Things that are created frequently: - MTLRenderPipelineState - MTLBuffer

MTLRenderPipelineStates are created on a semi-frequently basis, and in some case you create multiple. You may create one for depthRenderPipelineState where you describe the information to draw, shader functions, settings (depth and color) and how to read vertex data.

MTLBuffers are used to hold the specific vertex data. This information is then queued into the MTLCommandQueue.

Metal/MetalKit Glossary

As someone that has never built using OpenGL or other rendering languages I found that many metal tutorials, examples, and books do not define in one place what means what. So, this is a glossary of Metal/MetalKit terms as I learn them.

SIMD: Single Instruction Multiple Data

Rendering: The processing of an outline image using color and shading to make it appear solid and three-dimensional

Vertex: refers to a point in three dimensional space where two or more lines, curves or edges of a geometrical shape meet, such as the corners of a cube.

Rendering pipeline: parses list of vertices → GPU → shader functions process vertices → final image/texture → CPU → Screen

Shape Primitive: cube, sphere, cylinder or torus

MTKMeshBufferAllocator: manages the memory of the mesh

Render Command Encoder: Wrapping of commands to be sent to the GPU

Pipeline State: Tell the GPU that nothing will change until the state changes. Pipeline state contains pixel format, if should render with depth, vertex and fragment functions. Pipeline states are set by pipeline descriptors.

BGRA: Blue, Green, Red, Alpha

Command Buffer: Stores all commmands you ask the GPU to run

Render Pass Descriptor: Holds data (attachments) for the render destinations

Render Command Encoder: Holds all information necessary to send to the GPU so it can draw vertices